

How to burn a DVD-Video Disc with Nero Burning ROM
Alright, I know that many of you may say that there are plenty of DVD burning progs out there and that if I do a guide like this I should cover all of them. But I only got Nero and many users are asking me about how to burn a DVD-Video with Nero, so that's why Nero is the one for the guide.
This guide is supposed to be used by people that have created the compressed DVD files using DVD Shrink and now they don't know what to do with them or everyone that wants to see how to create a DVD-Video. Remember that for the DVD Decrypter guide you don't need Nero, as DVD Decrypter can burn the ISO file itself. Anyway before start reading this guide keep in mind that it is for use with DVD Shrink or other program that creates .IFO and .VOB files. Don't use it to burn files or mp3 in your DVD, for this you need to select a DVD-ISO disc.

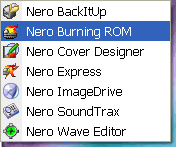
First of all I make clear that I use version 6. If you have an older version that supports DVD (I think all the versions after 5.5.x.x) then the process is the same. Please make sure you start Nero Buring ROM I show here and NOT the Nero SmartStart.

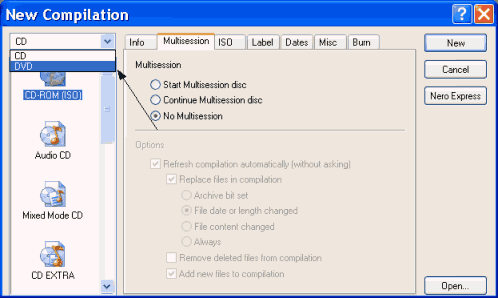
The new complication comes up. If you see a Wizard close it (there must be a button down right which says Close Wizard or something). Open the pull-down menu I show and select DVD.
NOTE: If there is no pull-down menu then your version does not support DVD.

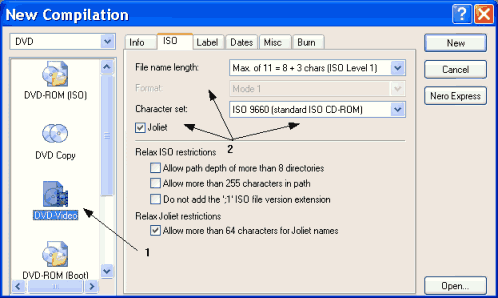
Select DVD-Video (1) from the list. Then just make sure the settings (2) are the same as shown here. Then click on the Label tab.

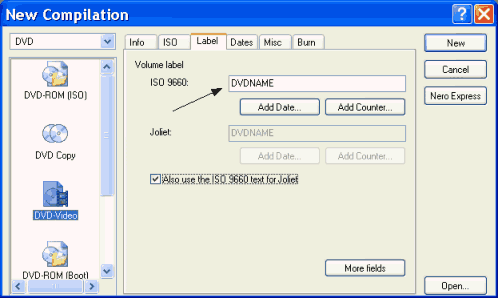
Here just put the label that you want your DVD to have. (It's the name that you see before your drive's letter every time you go to My Computer). After that click New.

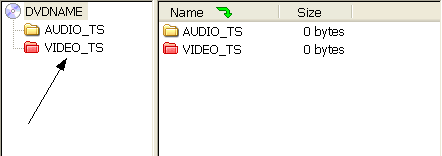
At the left of your screen you see the folders of the DVD we are going to burn. Notice the VIDEO_TS folder is red. Double click to open the VIDEO_TS folder.

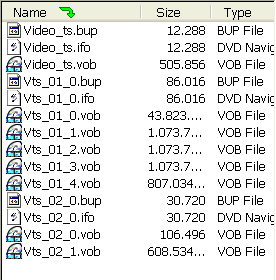
At the right of your screen you can see your hard drive. Browse to the folder where you have your DVD files (the files that DVD Shrink created).

Select all the files. I repeat: ALL the files.

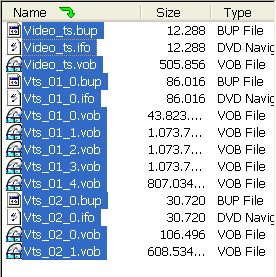
Now drag and drop ALL the files you selected at the step before into the VIDEO_TS folder we opened before at your left.
IMPORTANT: People keep asking me that. Yes you put ALL the files DVD Shrink or other program created into the VIDEO_TS folder. The AUDIO_TS folder remains empty.

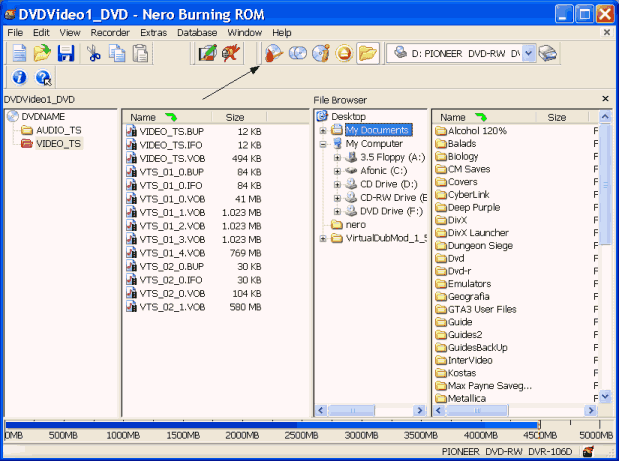
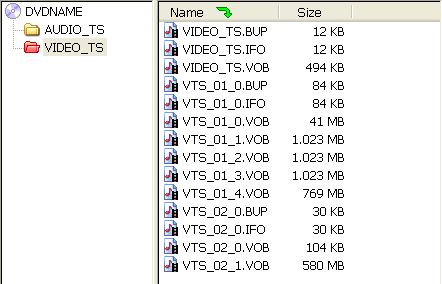
This is how Nero should look after all this. Note that the bat at the bottom should be all blue, or with just a little yellow where it finishes. Now click the burn icon that I show with the arrow.

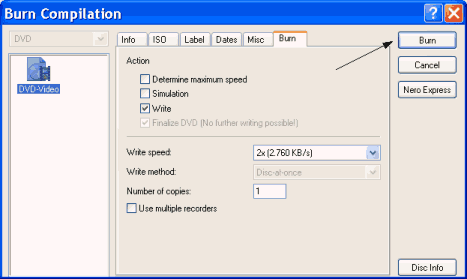
Here select just Write. Put the write speed for your media (for slower media like here, Nero reduces the speed from 4x to 2x, nothing to worry about) and finally click Burn!
Wait for it to finish and you will have a very nice DVD-Video disc!
This guide is supposed to be used by people that have created the compressed DVD files using DVD Shrink and now they don't know what to do with them or everyone that wants to see how to create a DVD-Video. Remember that for the DVD Decrypter guide you don't need Nero, as DVD Decrypter can burn the ISO file itself. Anyway before start reading this guide keep in mind that it is for use with DVD Shrink or other program that creates .IFO and .VOB files. Don't use it to burn files or mp3 in your DVD, for this you need to select a DVD-ISO disc.
First of all I make clear that I use version 6. If you have an older version that supports DVD (I think all the versions after 5.5.x.x) then the process is the same. Please make sure you start Nero Buring ROM I show here and NOT the Nero SmartStart.
The new complication comes up. If you see a Wizard close it (there must be a button down right which says Close Wizard or something). Open the pull-down menu I show and select DVD.
NOTE: If there is no pull-down menu then your version does not support DVD.
Select DVD-Video (1) from the list. Then just make sure the settings (2) are the same as shown here. Then click on the Label tab.
Here just put the label that you want your DVD to have. (It's the name that you see before your drive's letter every time you go to My Computer). After that click New.
At the left of your screen you see the folders of the DVD we are going to burn. Notice the VIDEO_TS folder is red. Double click to open the VIDEO_TS folder.
At the right of your screen you can see your hard drive. Browse to the folder where you have your DVD files (the files that DVD Shrink created).
Select all the files. I repeat: ALL the files.
Now drag and drop ALL the files you selected at the step before into the VIDEO_TS folder we opened before at your left.
IMPORTANT: People keep asking me that. Yes you put ALL the files DVD Shrink or other program created into the VIDEO_TS folder. The AUDIO_TS folder remains empty.
This is how Nero should look after all this. Note that the bat at the bottom should be all blue, or with just a little yellow where it finishes. Now click the burn icon that I show with the arrow.
Here select just Write. Put the write speed for your media (for slower media like here, Nero reduces the speed from 4x to 2x, nothing to worry about) and finally click Burn!
Wait for it to finish and you will have a very nice DVD-Video disc!


0 comments:
Post a Comment